Getting started
Getting Started Guide to Build Your First App
The following guide will help you get started with Ilmos. In this guide, we will walk you through the steps to create your first app.
Terminology
Ilmos allows you to create application using the popular and versatile software architecture pattern called MVC (Model-View-Controller).- Controllers: Manage the Logic and Data Flow of your app.
- Views: Define the User Interface and visual layout of information you wish to present to the user.
- Models: Store and structure the Data your application uses.
When a user interacts with your app, the request is sent to the appropriate controller, which processes the request and interacts with the model to retrieve or modify data. The controller then selects the appropriate view to render the response, presenting the user with the desired information.
For example, in a book store app, the Model would store the book data structured in a form that makes it easy to retrieve it, the Controller might handle requests to search for books, and the View would display the search results to the user perhaps organized in a list sorted by title or author.
Building applications with Ilmos
This section focuses on the basics of using Ilmos, including how to create an app, design an interface, and connect the data.
By the end of this section, you will have a solid understanding of how to use Ilmos to build your first app. You will also be familiar with the key concepts and features of Ilmos, which will help you get started on your app-building journey.
Building your first app
Step 1: Create an App
Once logged in, go to your dashboard and click “Create App.”
Enter a name for your app (e.g., mycrm) and an optional description, then click “Add new app” to create it.
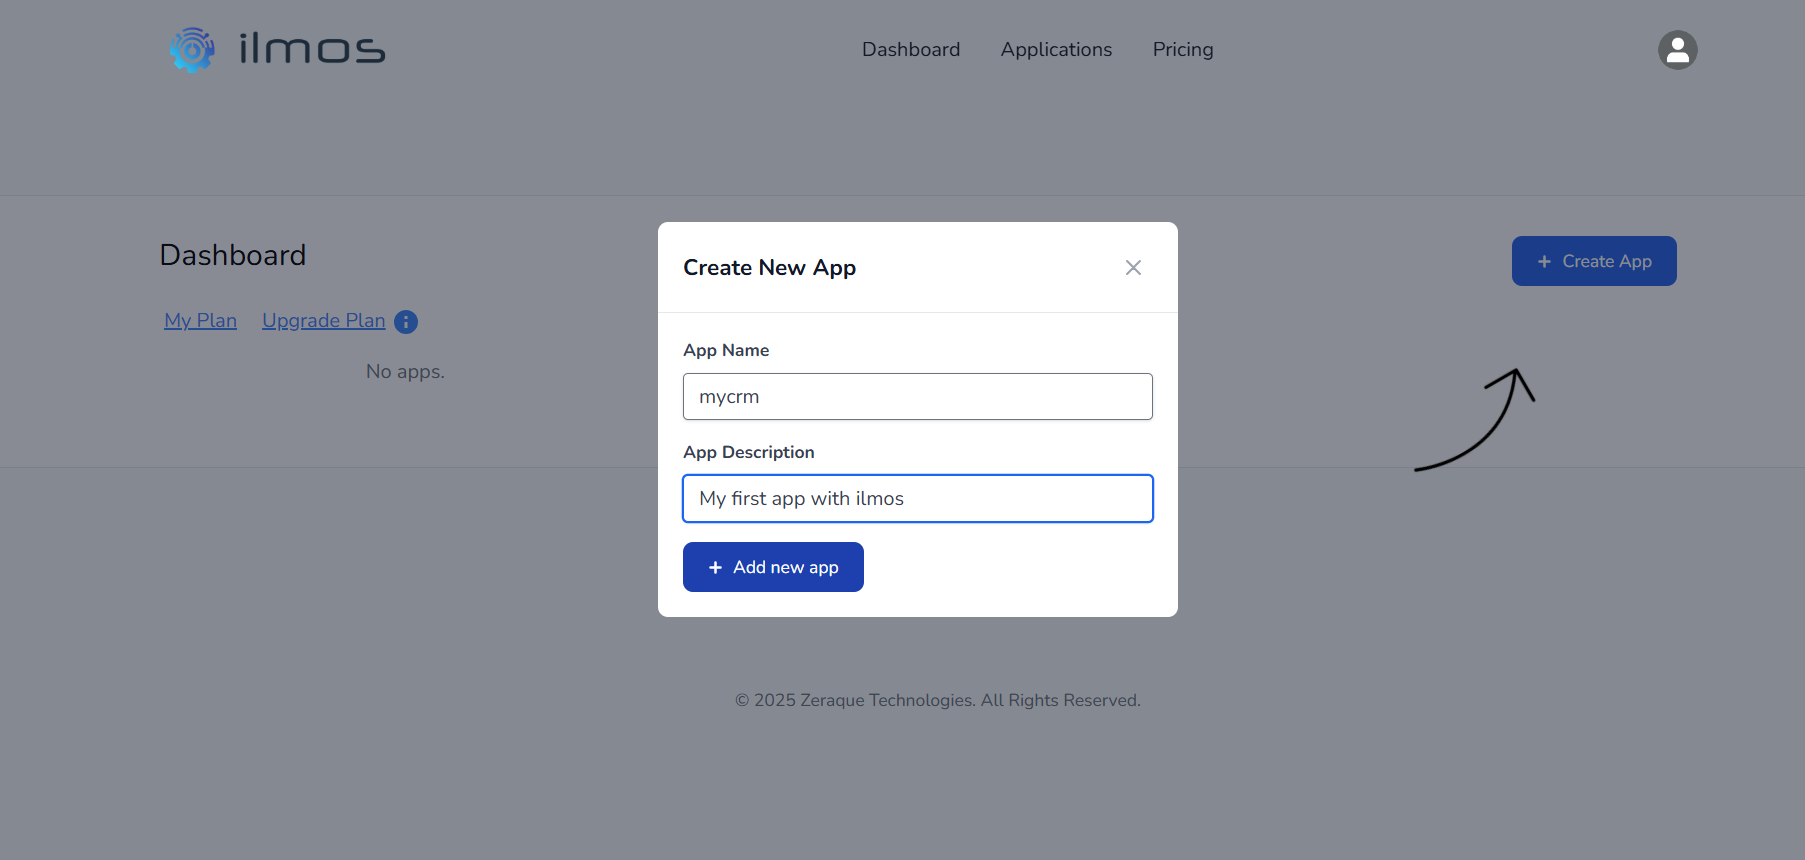
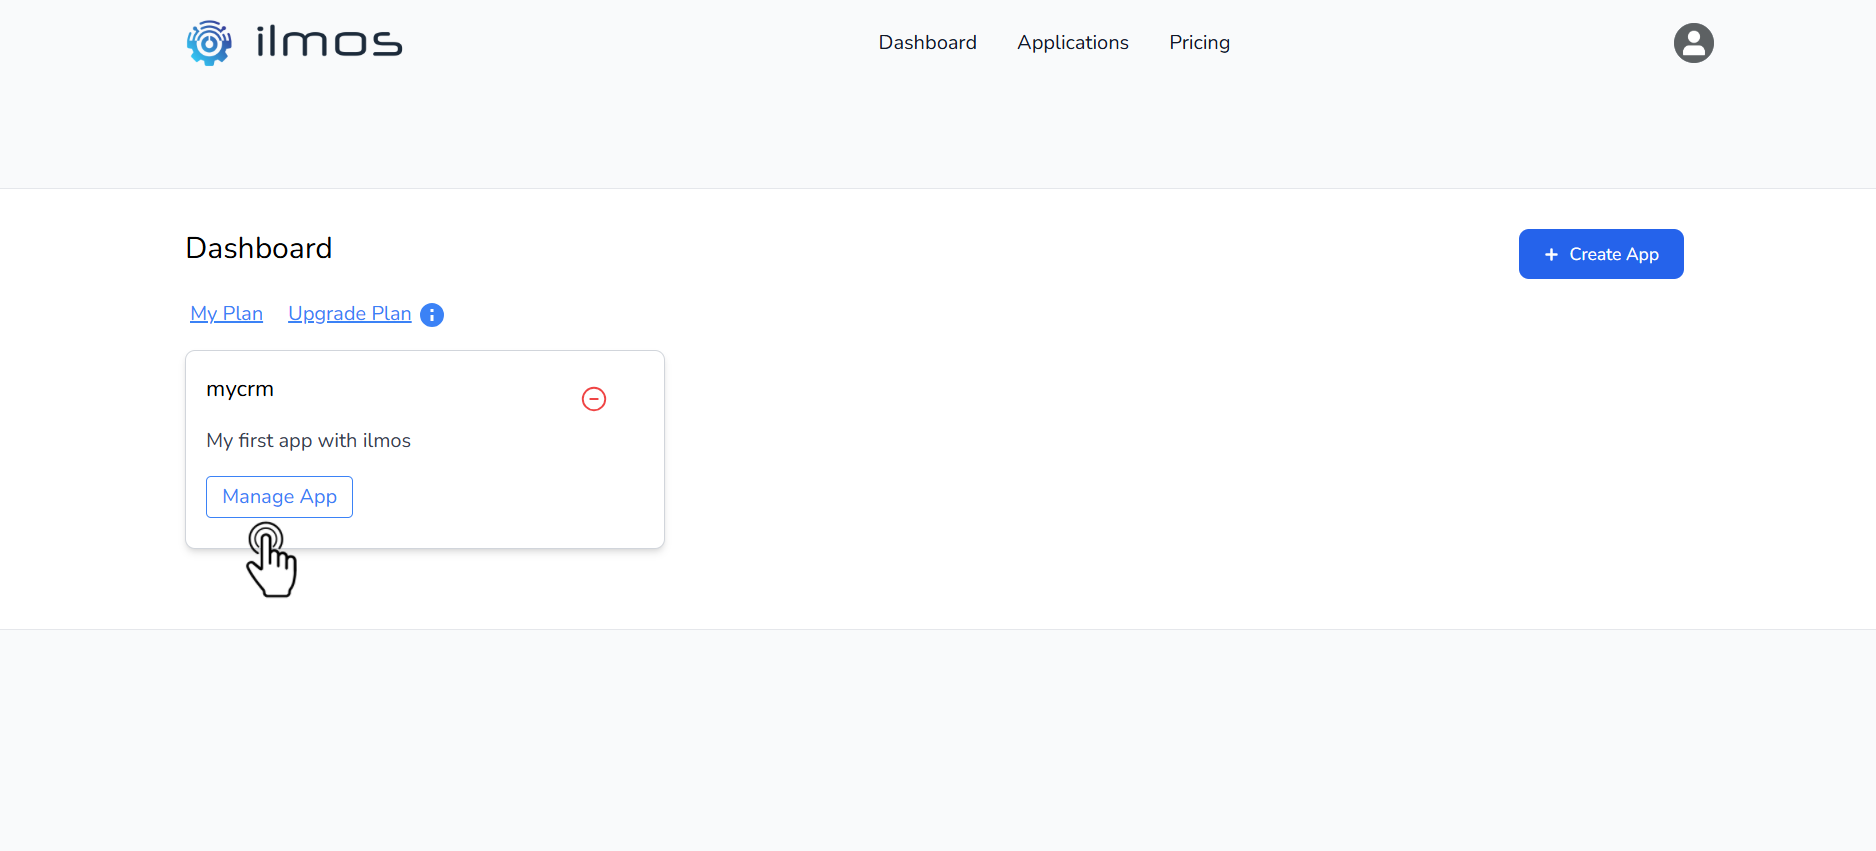
This will create all the infrastructure needed for the app. Once it's created, you will see the app along with a “Manage App” button.
Your application will be available at:
https://<yourAppName>.apps.ilmos.io (e.g.,
https://mycrm.apps.ilmos.io).
Step 2: Set Up a Controller
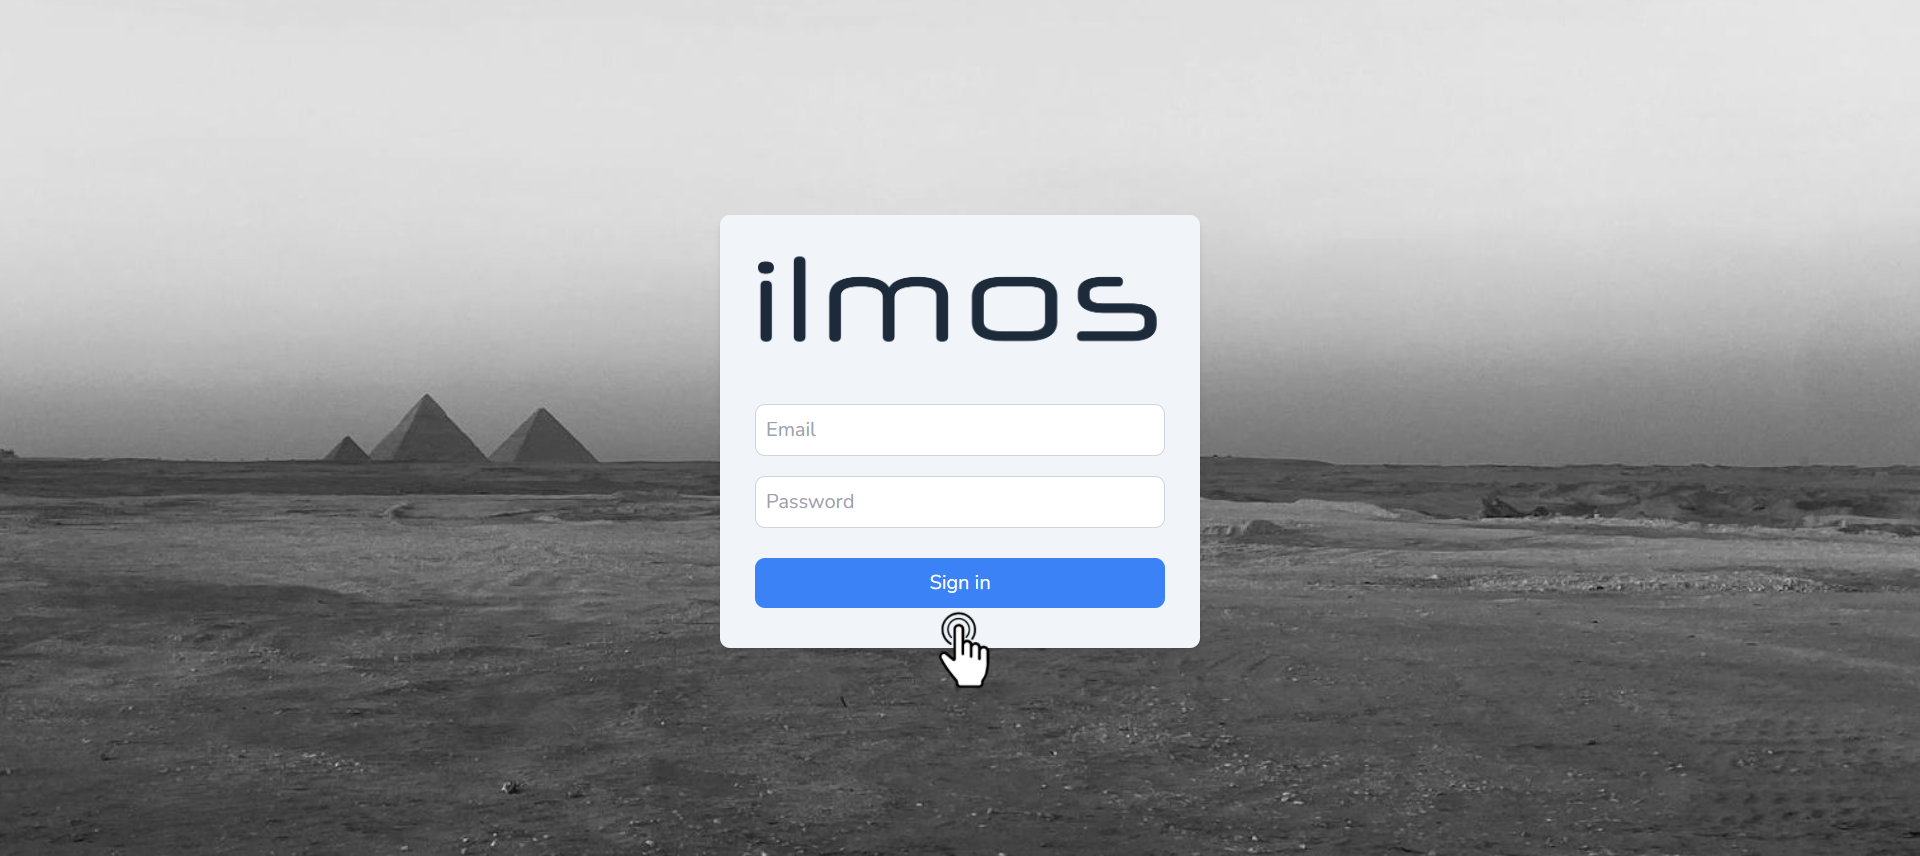
Click “Manage App” to launch the application builder, then log in with your credentials.
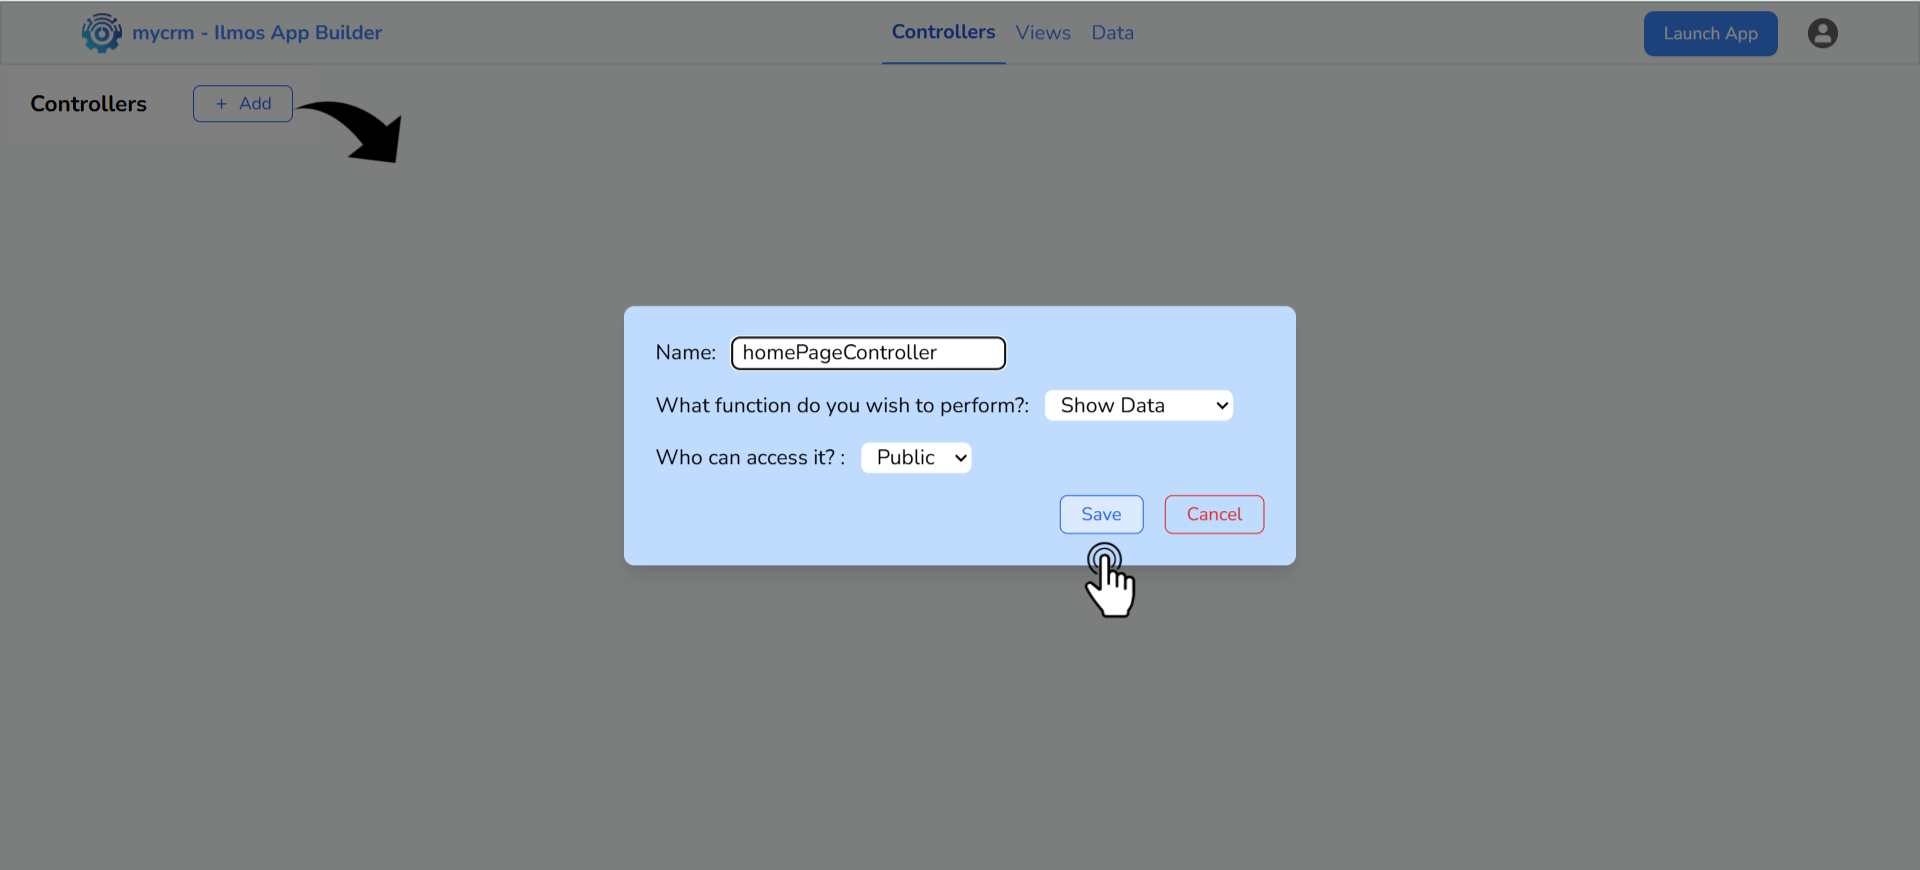
- Navigate to the Controllers section and click “Add Controller.”
- Enter a name (e.g.,
homePageController). - Select a function (e.g.,
Show Data) and save it. - Leave the access level at public to allow access to everyone.
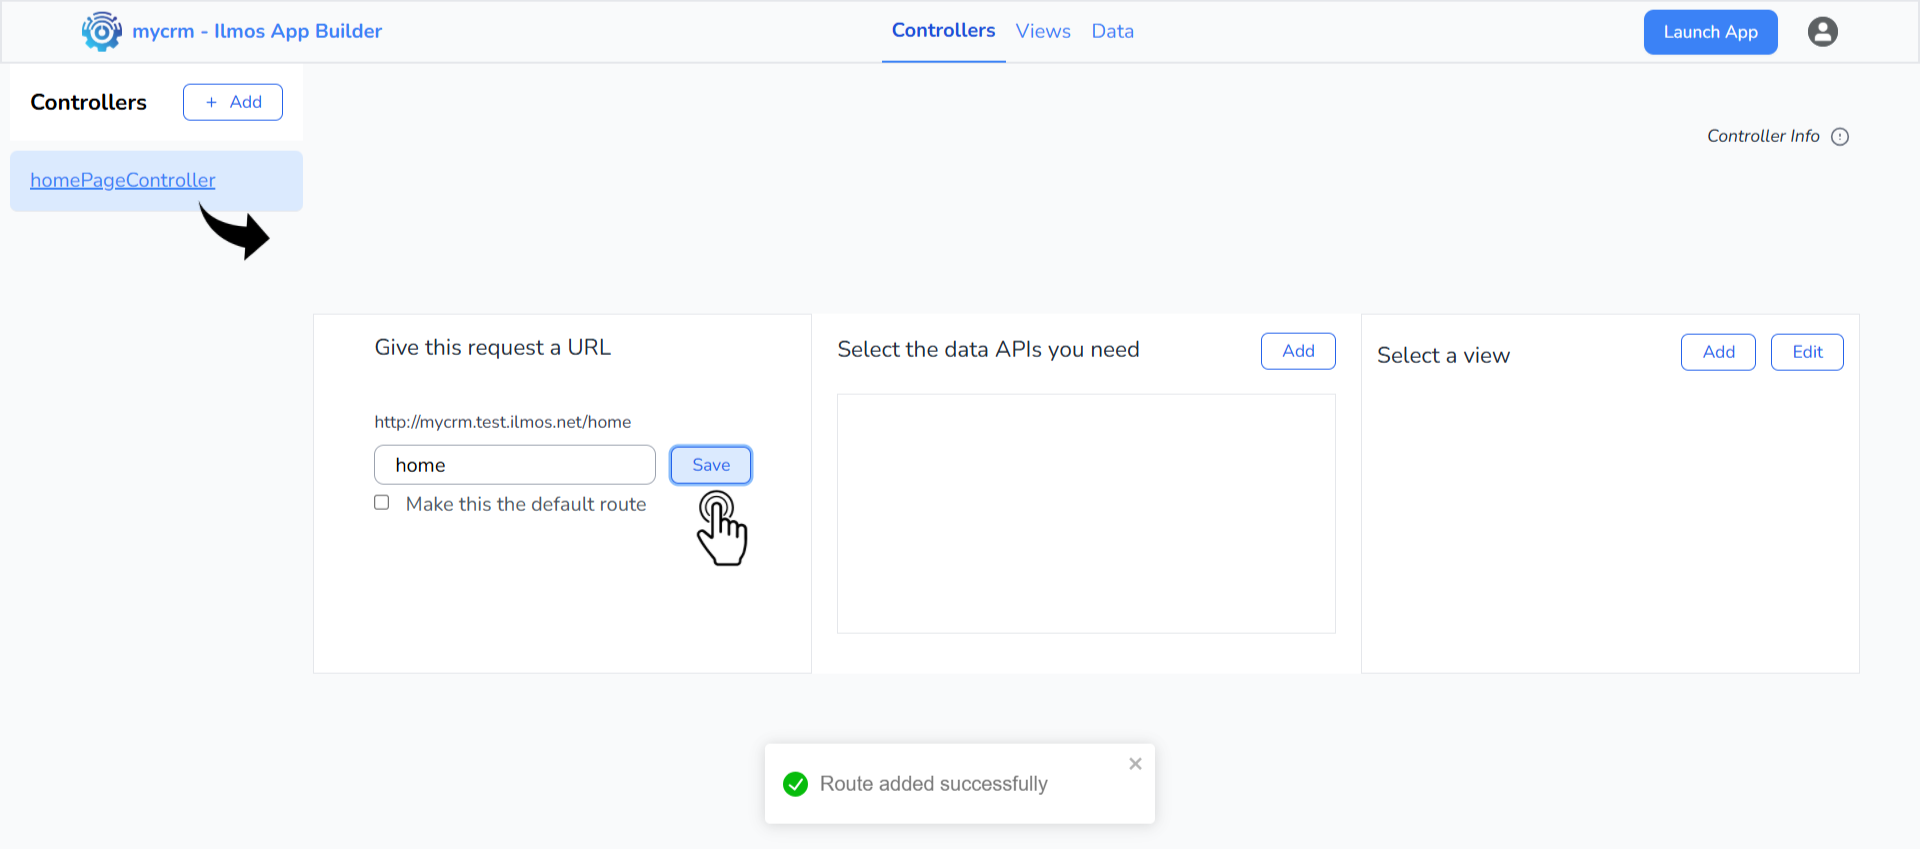
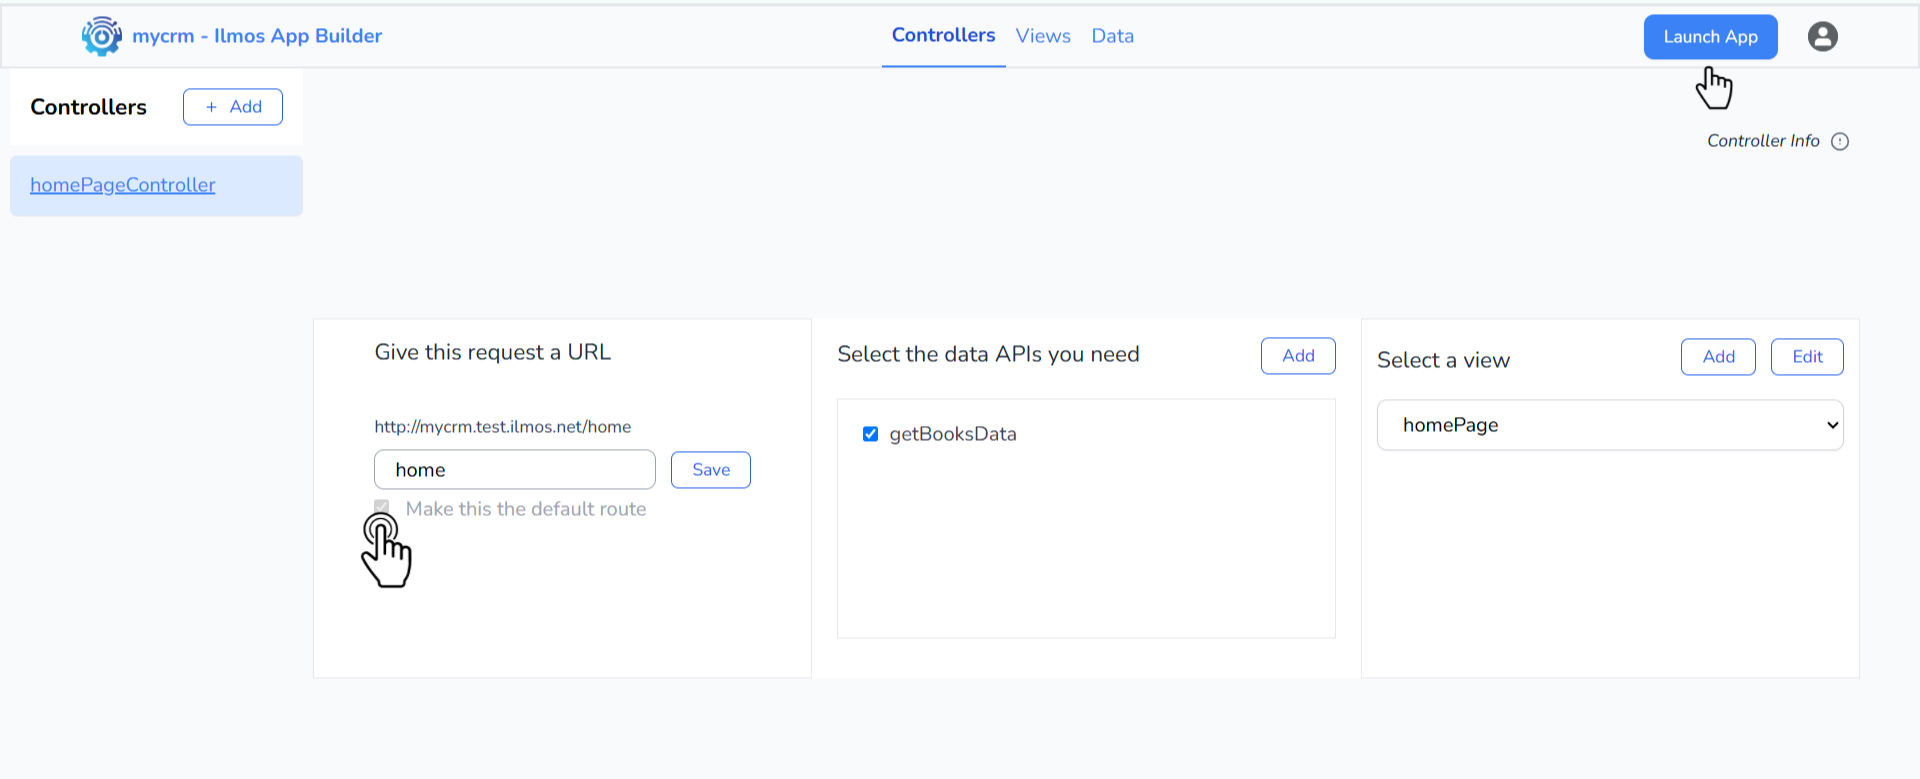
- Click on the created controller and provide a URL to access it (e.g.,
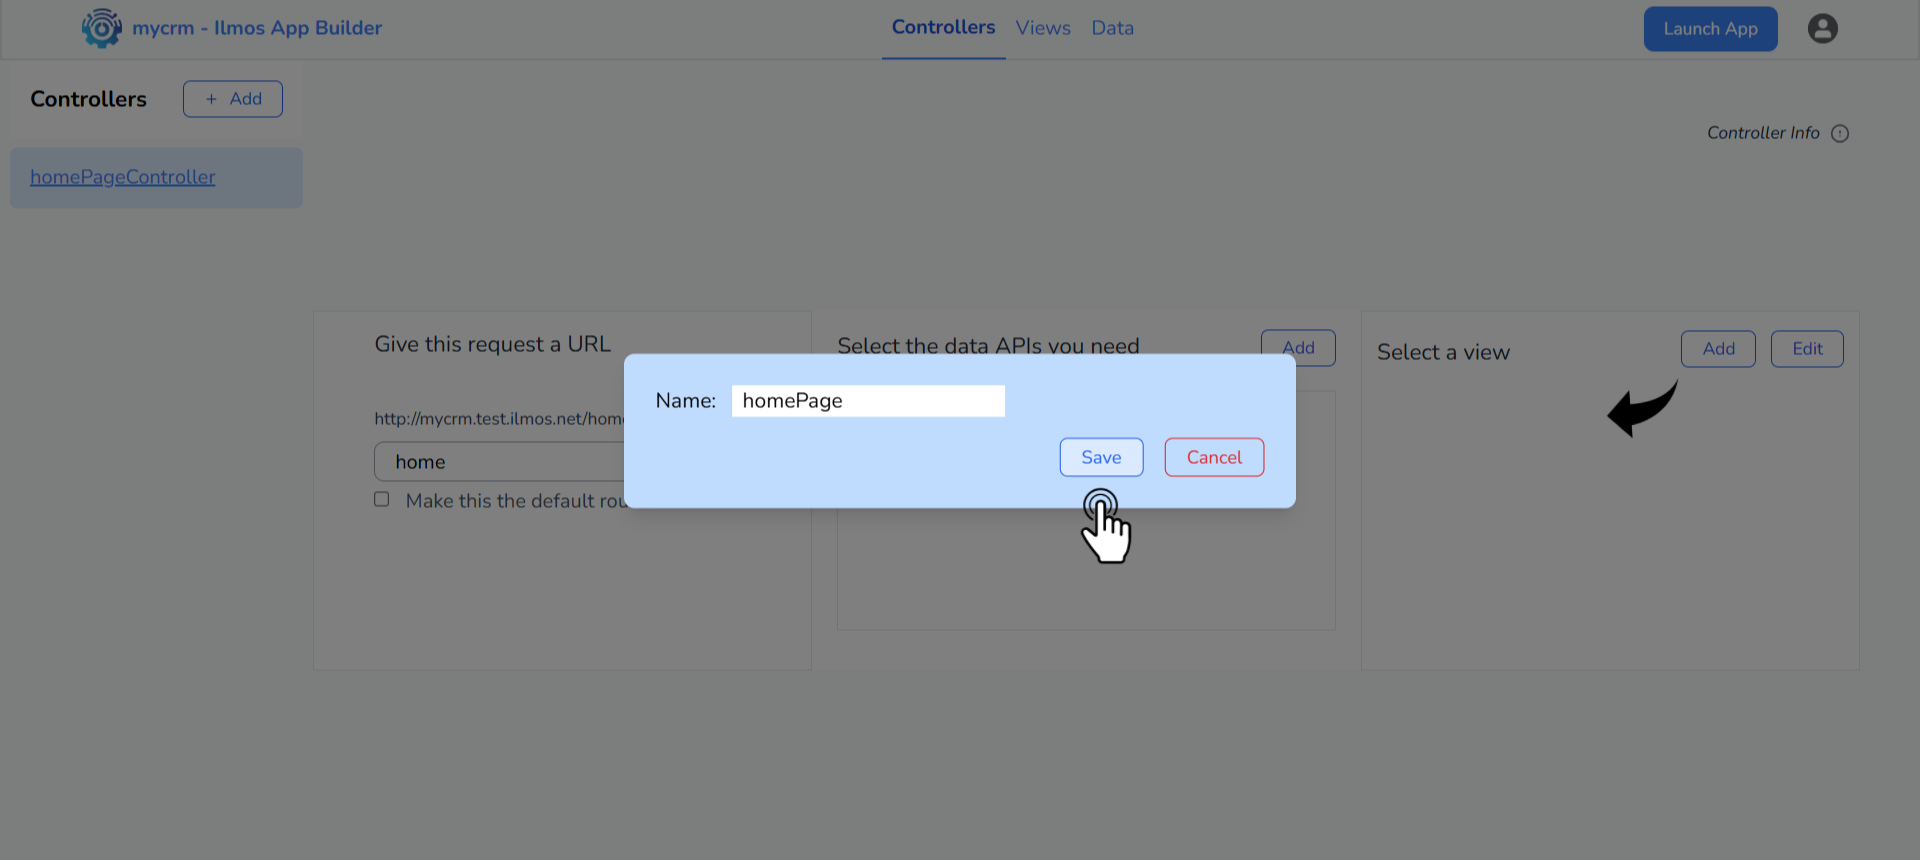
home). Click on Save. - Click “Add” in the View section on the right, name it (e.g.,
homePage), and save it.
"Show Data" as the function.
If you want to Create, Update or Delete data, select the corresponding function.
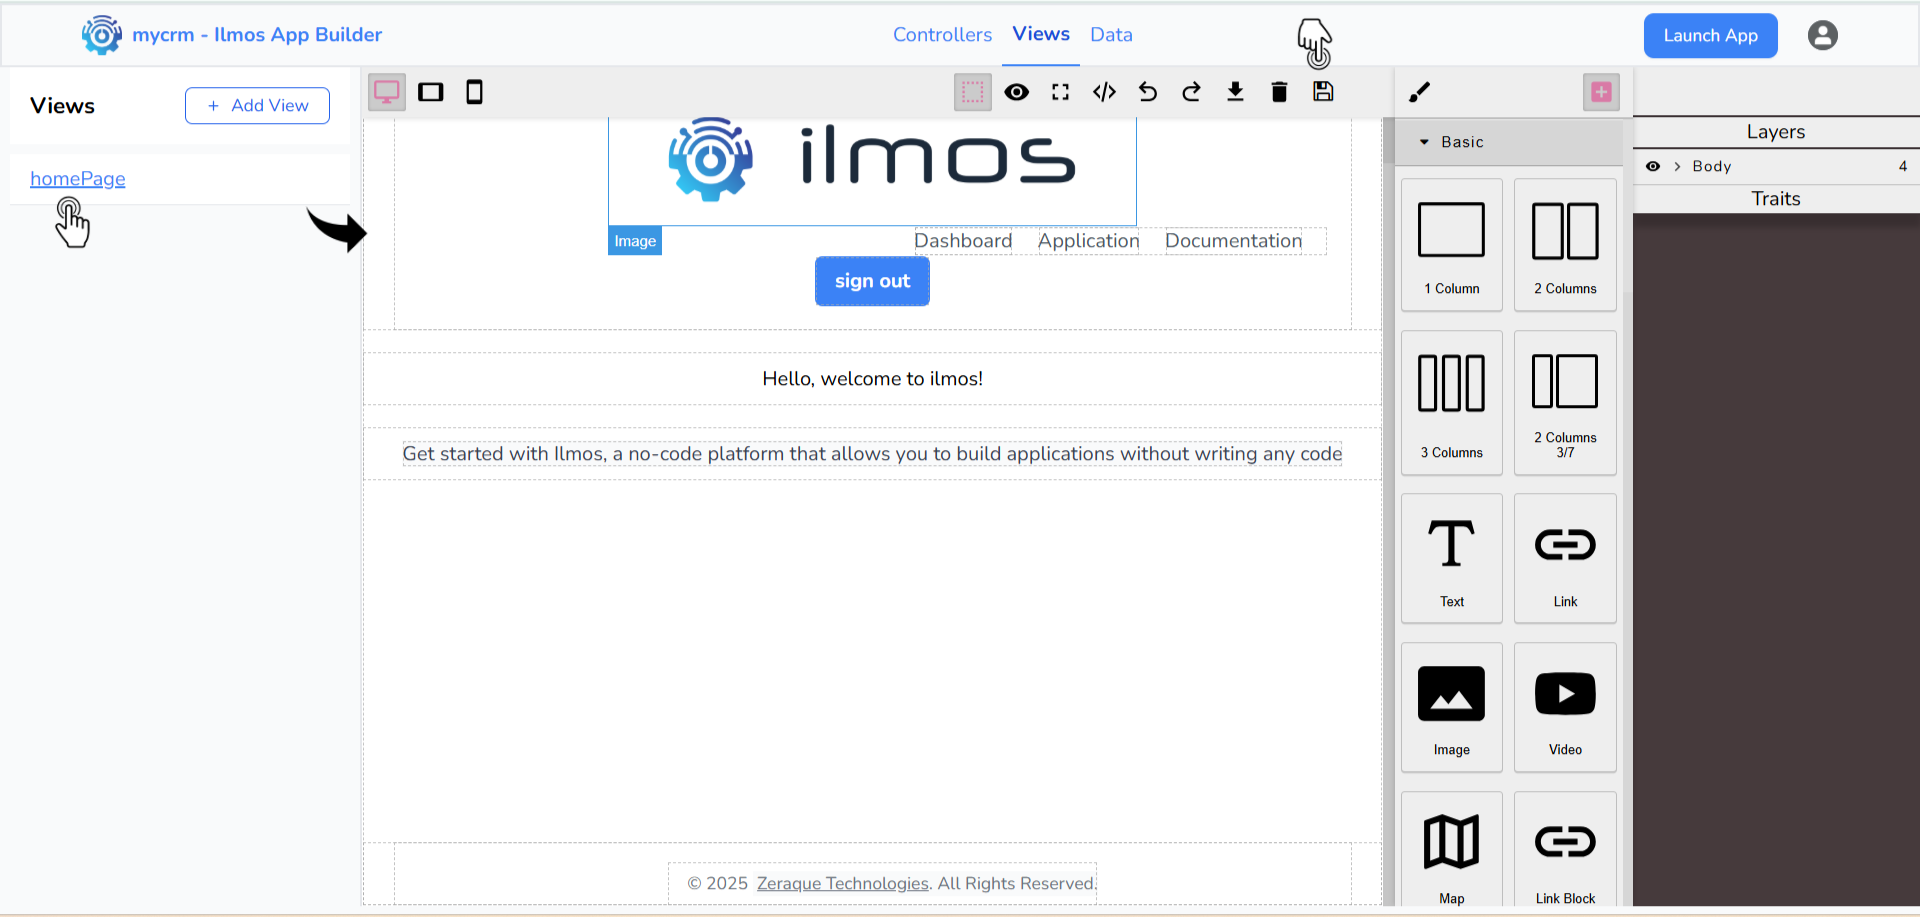
Step 3: Design Your View
Click the Edit button to edit the view you just created and design your page using Ilmos's drag-and-drop builder.
Select components like buttons, text fields, images, and more from the component panel on the right, then drag them onto your page layout.
Click on the component in the canvas to edit its properties in the right panel. You can change the text, colors, sizes, decorations, background images and other attributes to customize the look and feel of your app.
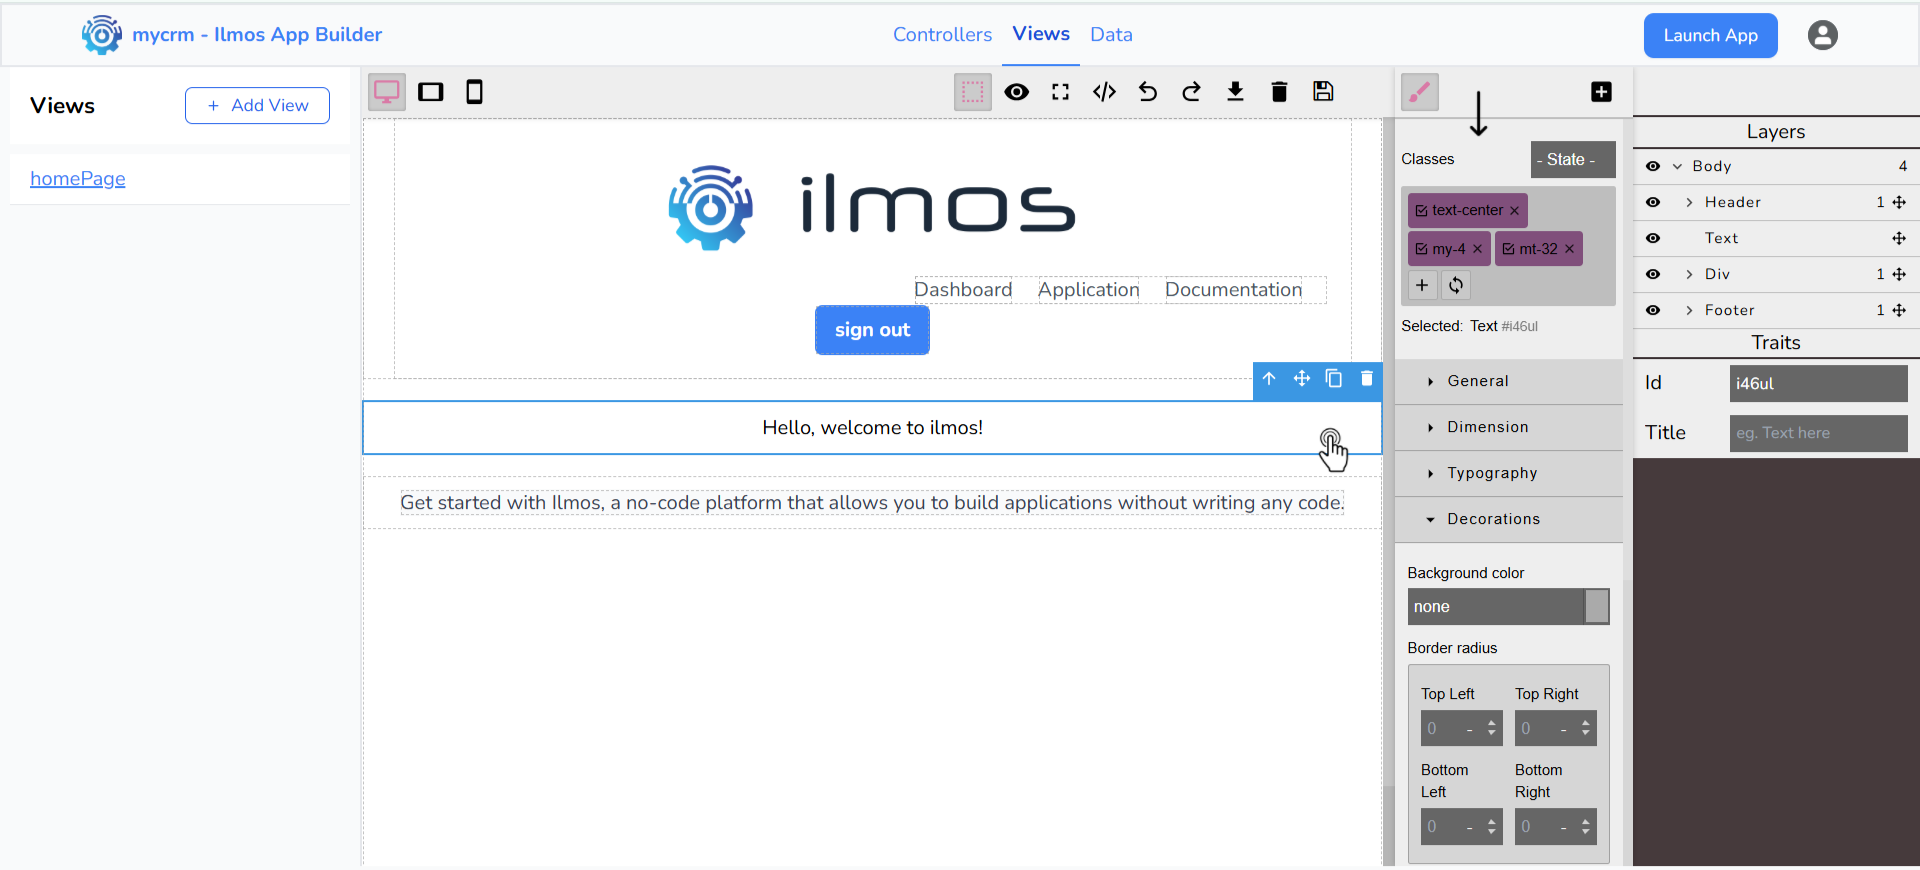
Click the Save button to apply your changes. Once saved, your page will be accessible at:
https://<yourAppName>.apps.ilmos.io/<yourRouteName>. (e.g.,
https://mycrm.apps.ilmos.io/home)
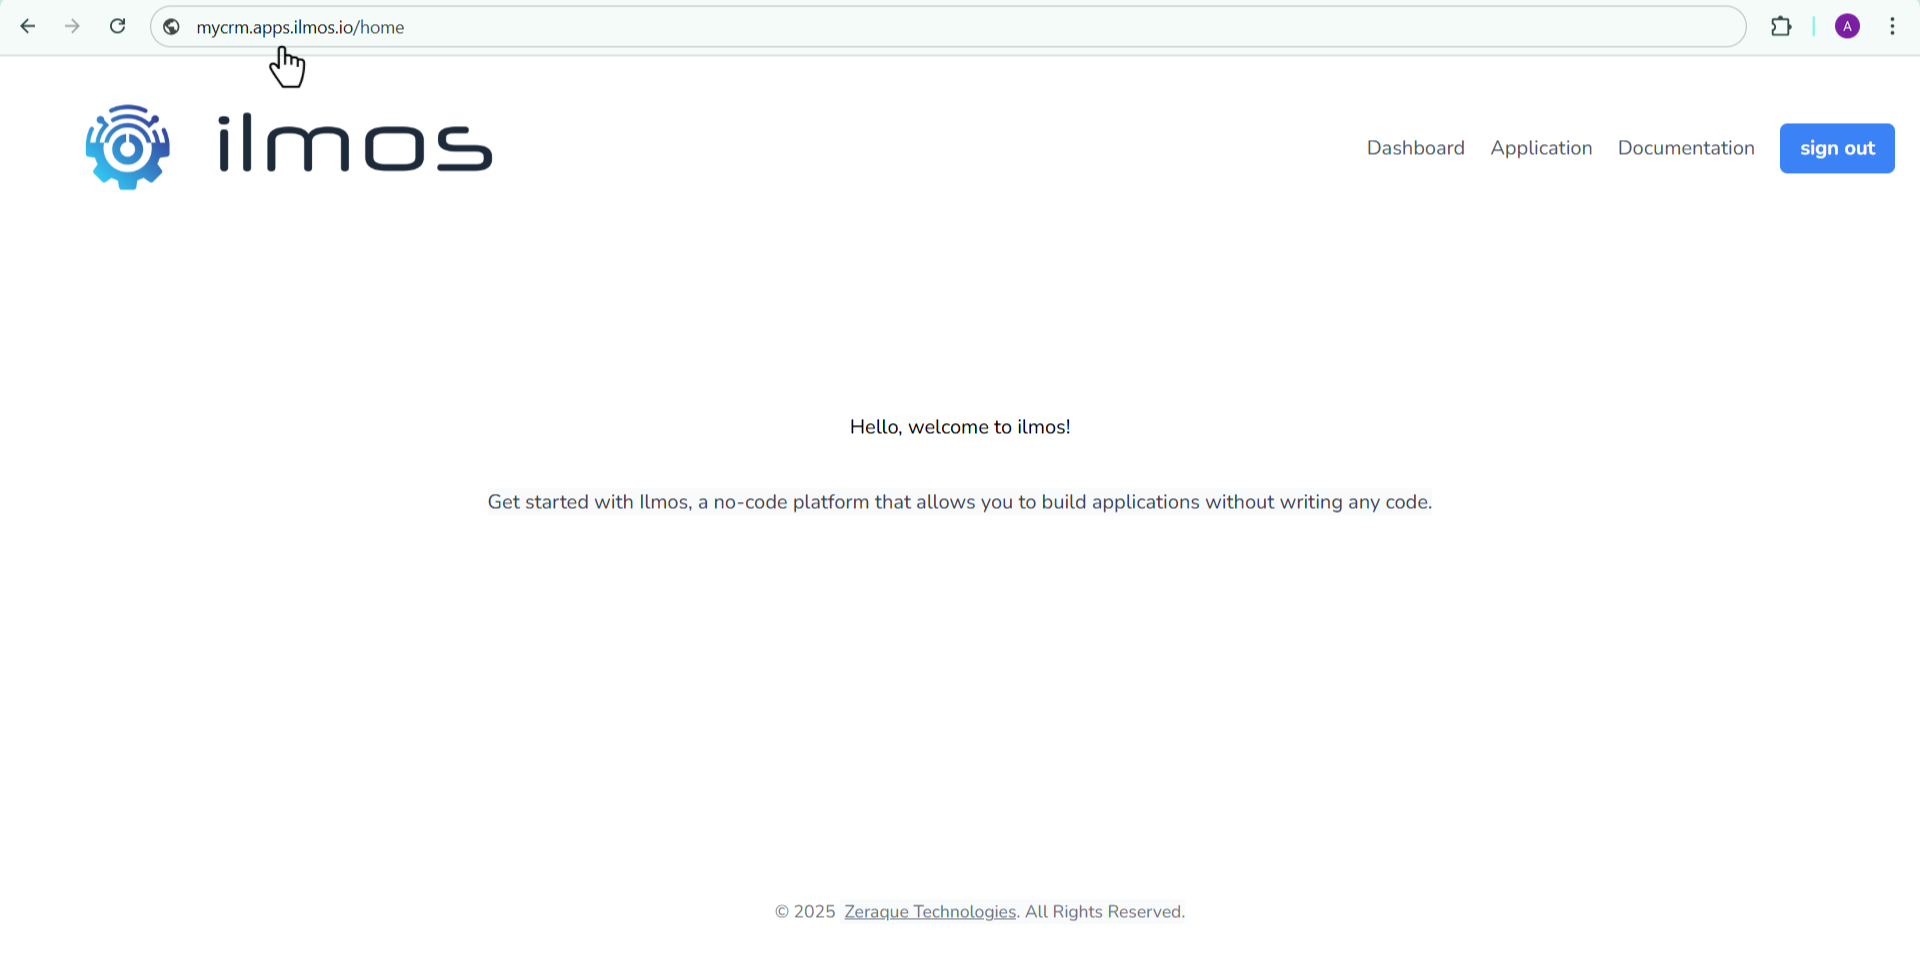
You can set your route as the default route by checking the checkbox below the route name.
Once set, clicking the Launch App button will take you directly to that page.
Add Data to your app
Applications most often work with data. That data needs to be stored in a structured way and displayed to the user when required. In this section we will learn how to add data to your application and display it using the DataTable component.
Step 1: Add your data
If your application needs to work with structured information (like books, products, or records), you'll need to define data tables. This allows you to store, retrieve, and display data dynamically.
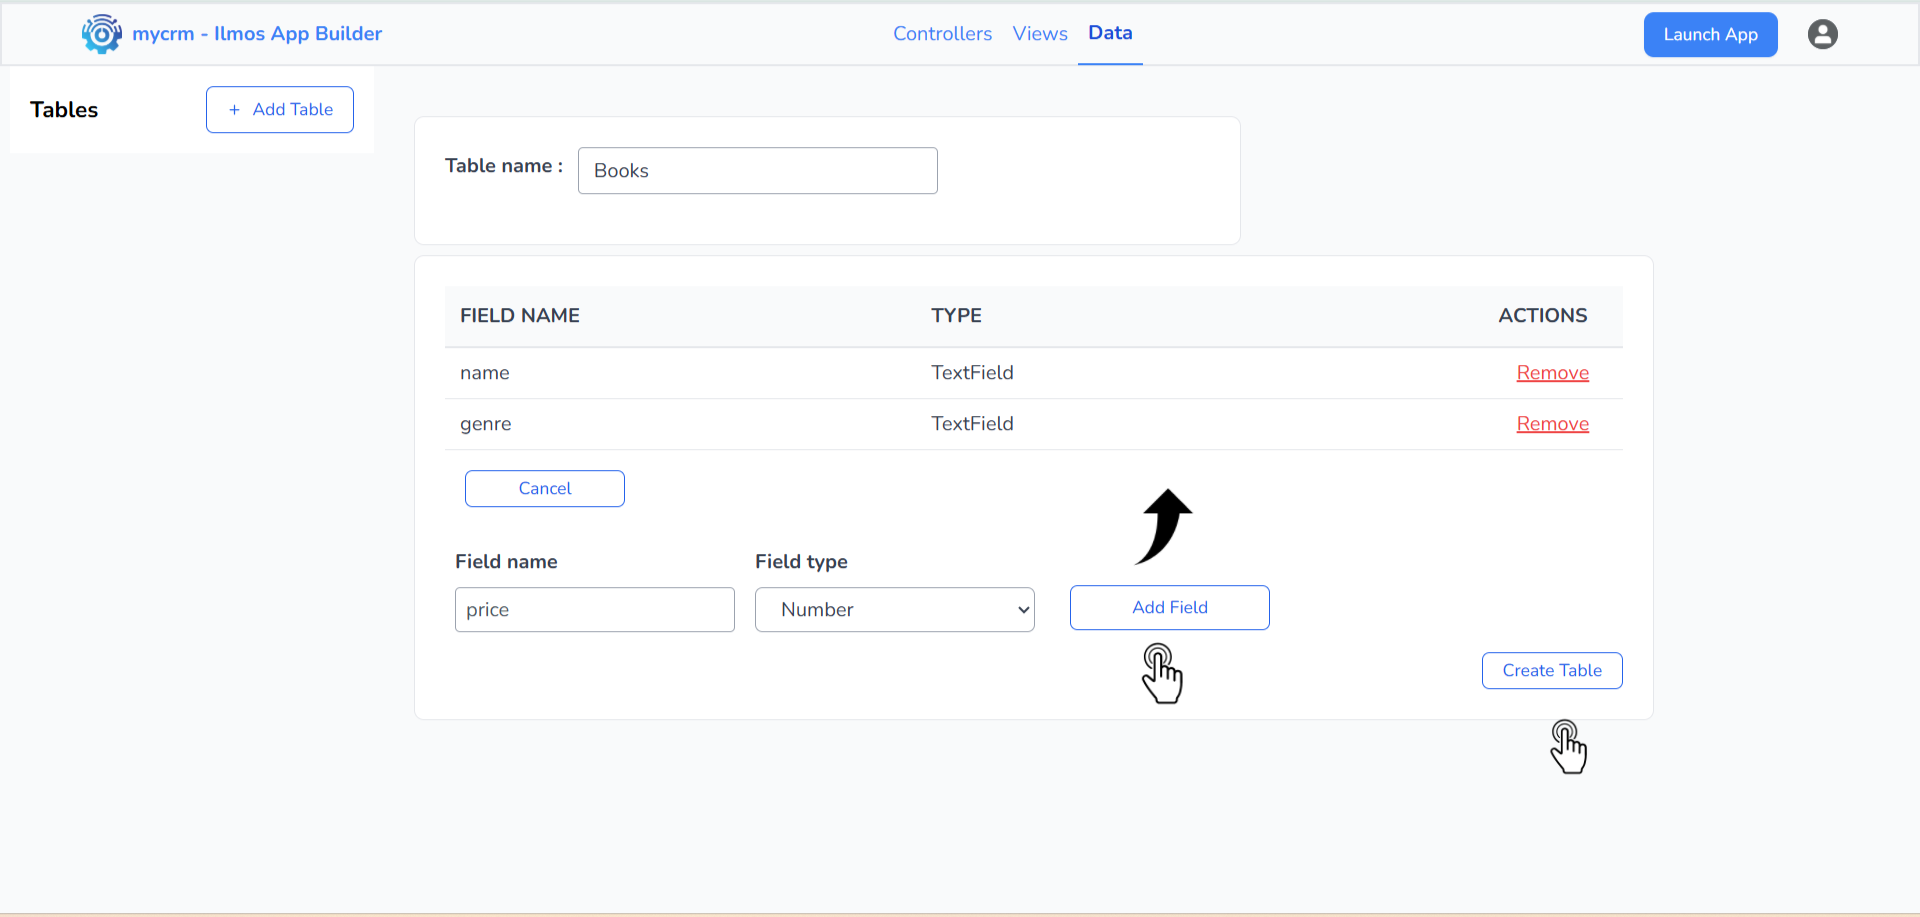
To get started, go to the Data tab in the builder. Enter the table name (e.g., Books), then click on Add Field. Enter the field name (e.g., name), Select the field type (e.g., Text), and click the Add Field button. Repeat this process for all required fields, and then click on the Create Table button to finalize the table.
For example, a Books table might include:
- name: TextField
- genre: TextField
- price: Number
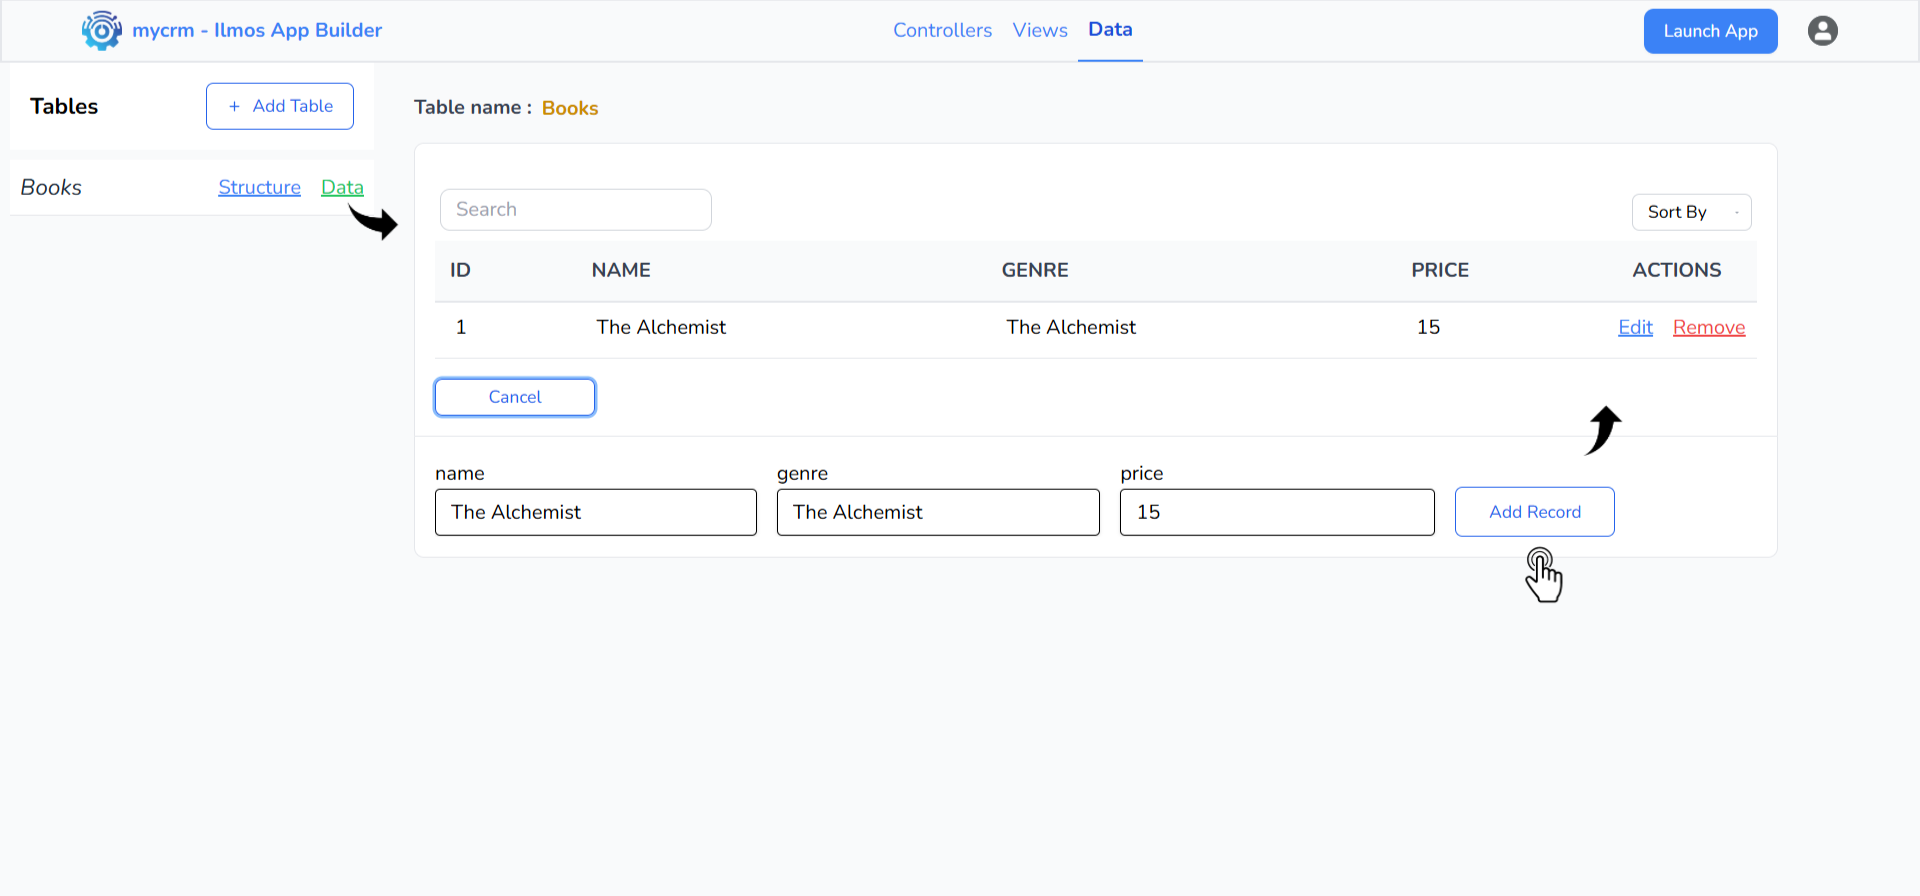
Once the table is created, click the table name → go to the Data section → click on the Add Record button. Enter values into each field (e.g., name: "The Alchemist", genre: "Fiction", price: 15) and click on Add Record to save it. You will be able to see the data in the table above.
Step 2: Update the Controller
Navigate to the Controllers section and select the controller you created earlier (homePageController).
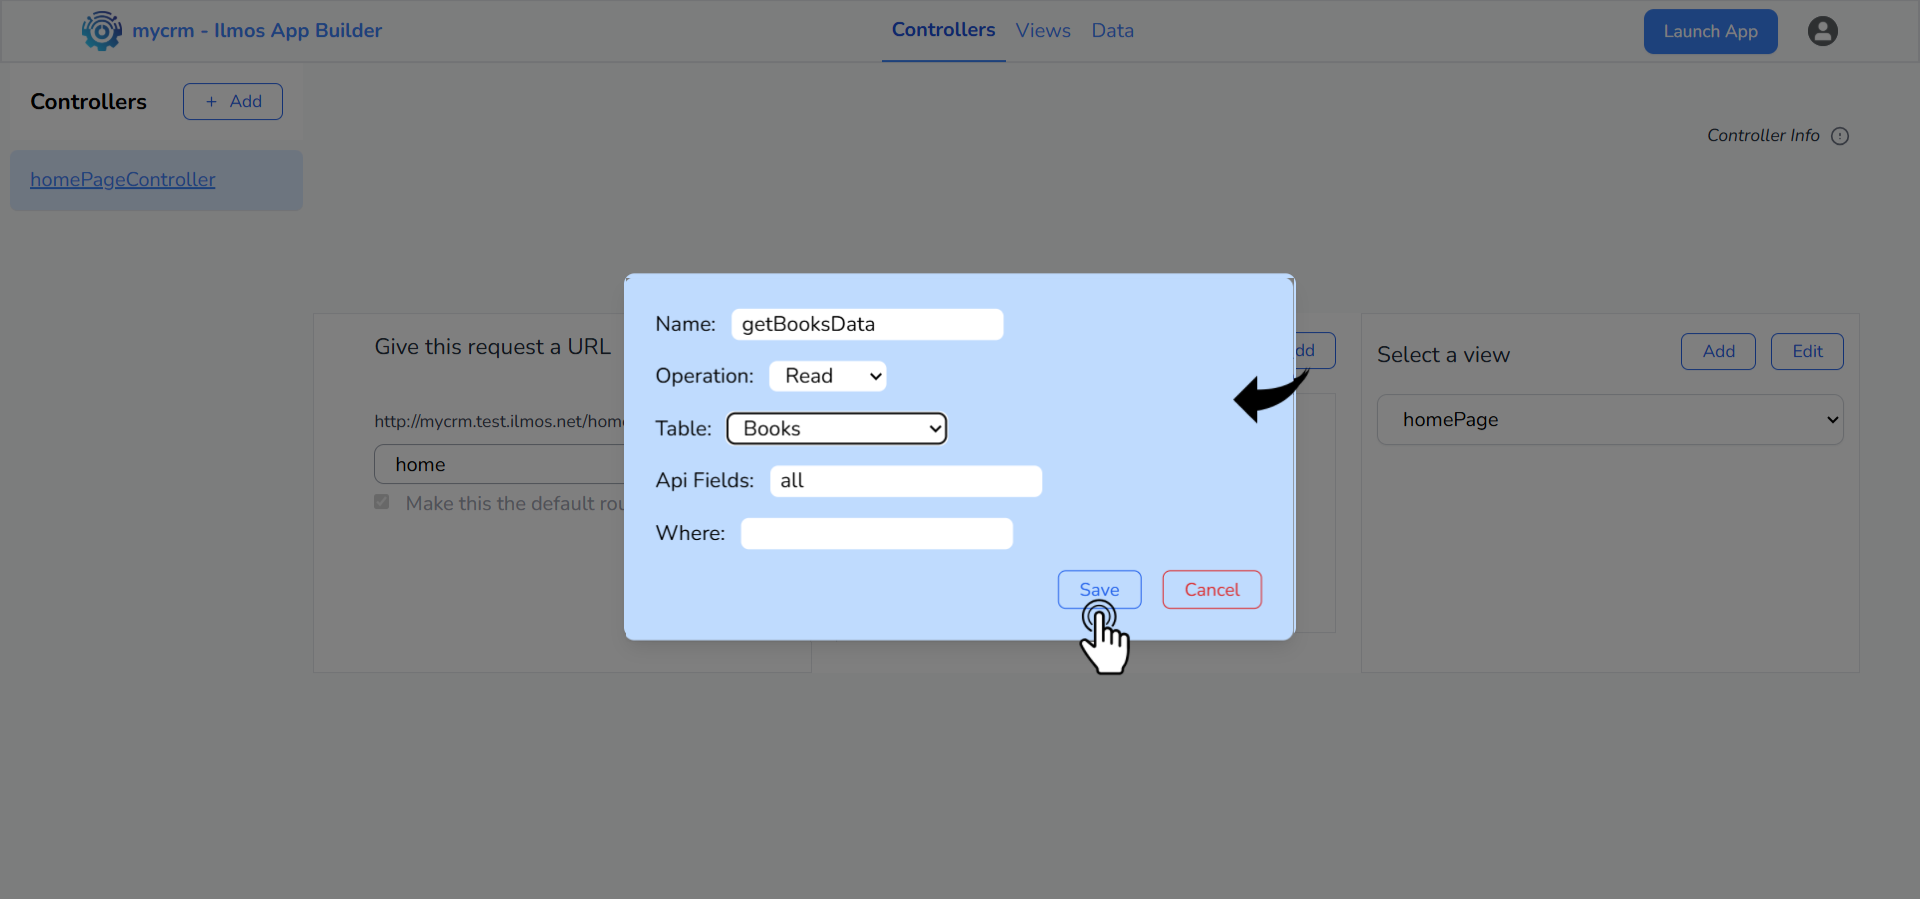
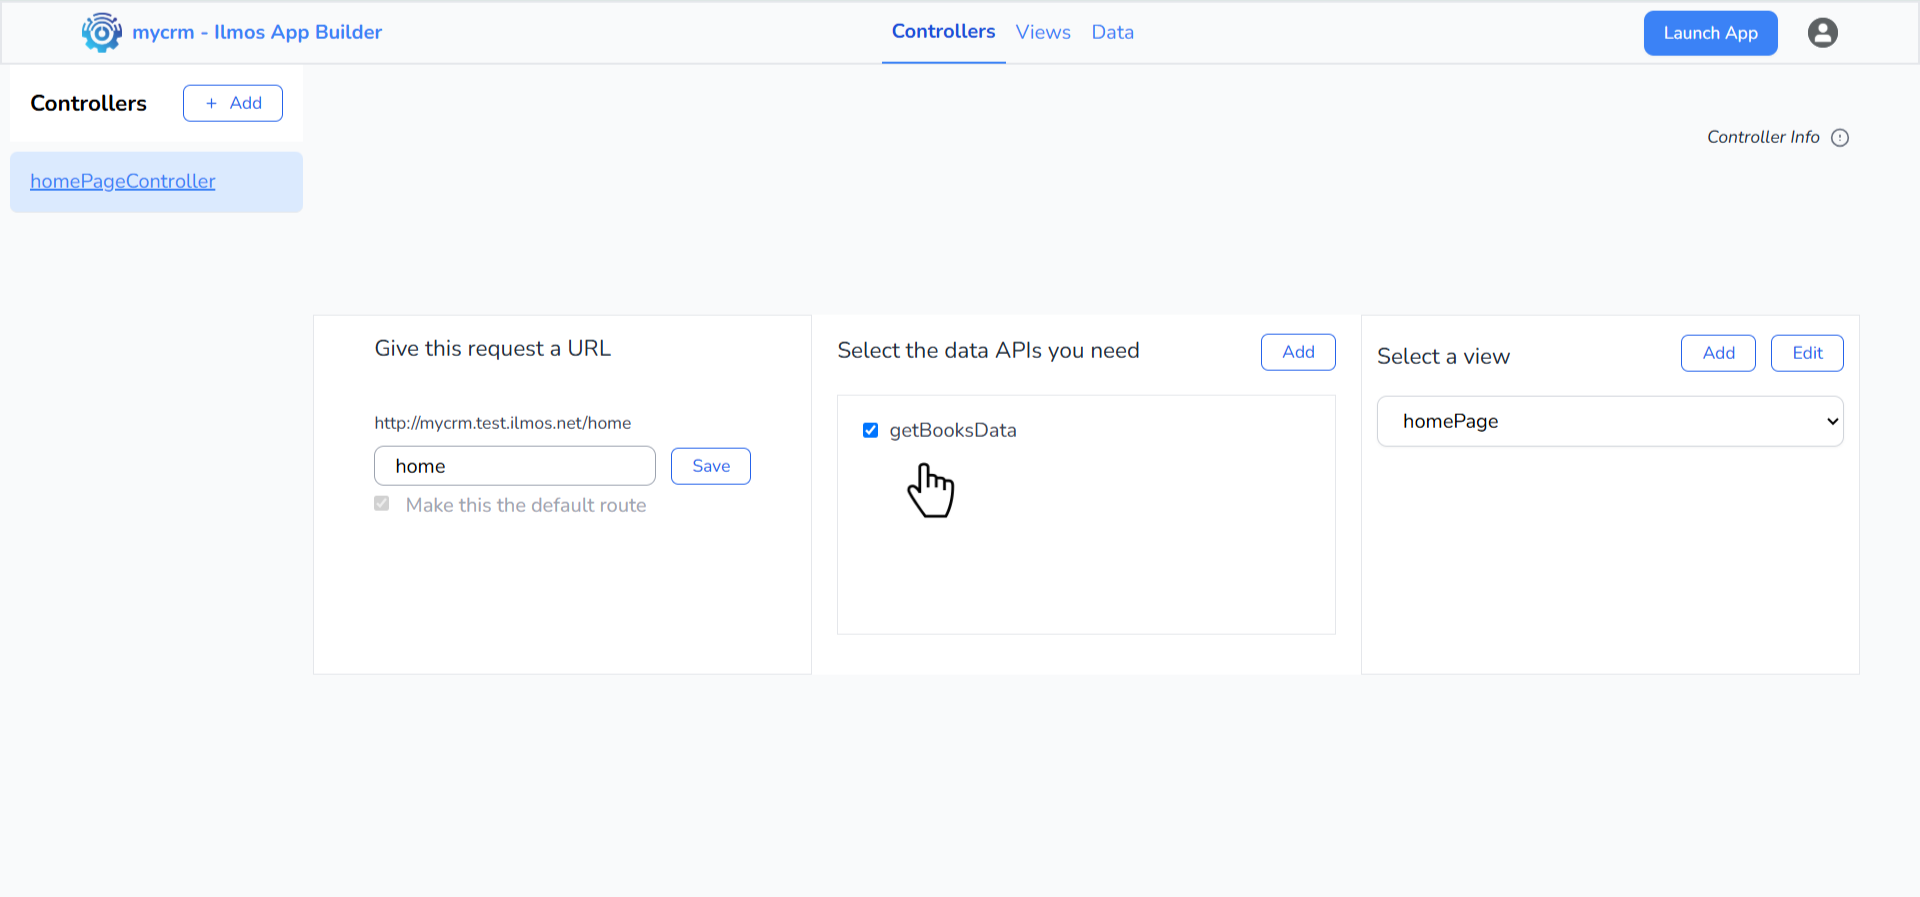
We will need to add an Model API (aka Data API) to this controller to fetch the data from the database.
-
Click on 'Add' button in the Data API section in the middle to add an Api, name it (e.g.,
name: getBooksData, operation: read, Table: Books) and save it.
By default, all fields will be fetched from the database. You can filter the fields by adding the field names in 'Api Fields' input.
- This will create a Model Api and will be attached to the selected controller.
Step 3: Update Your View
Since we would like to display data from a table, let's use the
DataTable component.
The DataTable component is one of our main custom components that allows you to
display
data in a tabular format.
It is a powerful and flexible component that can present data fetched via APIs (ReadApis). It also
supports various display types such as table, card, or product card view.
You can configure which fields to display, add filters, and assign row-specific action buttons. These
actions can perform tasks like navigating to a route and executing JavaScript.
To display data using the DataTable component, you first need a ReadApi that fetches
data from your database.
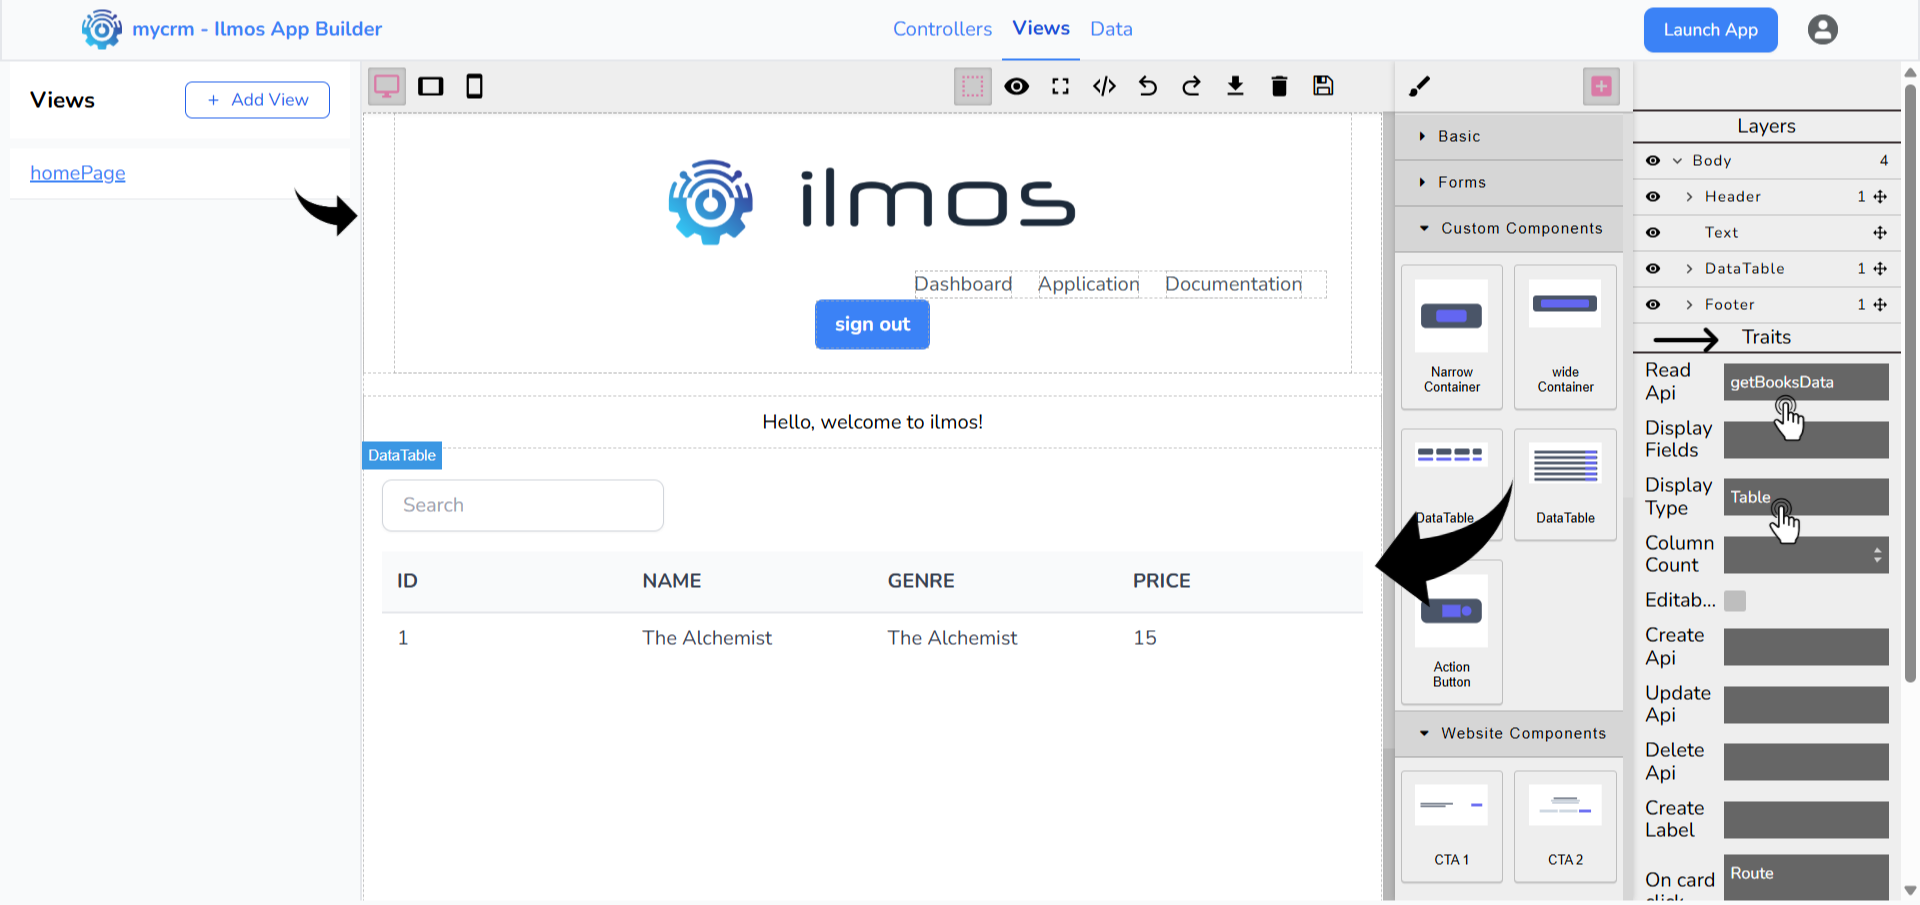
- First open the view you created earlier by clicking on the Edit button in the View section.
- Drag and drop the DataTable component from the Custom Components section.
- Click on the DataTable, go to the Traits panel, and select the appropriate
ReadApi (e.g.,
getBooksData). - Select the
Display TypeasTable - Once selected, the data will appear in the canvas, dynamically connected to your database..
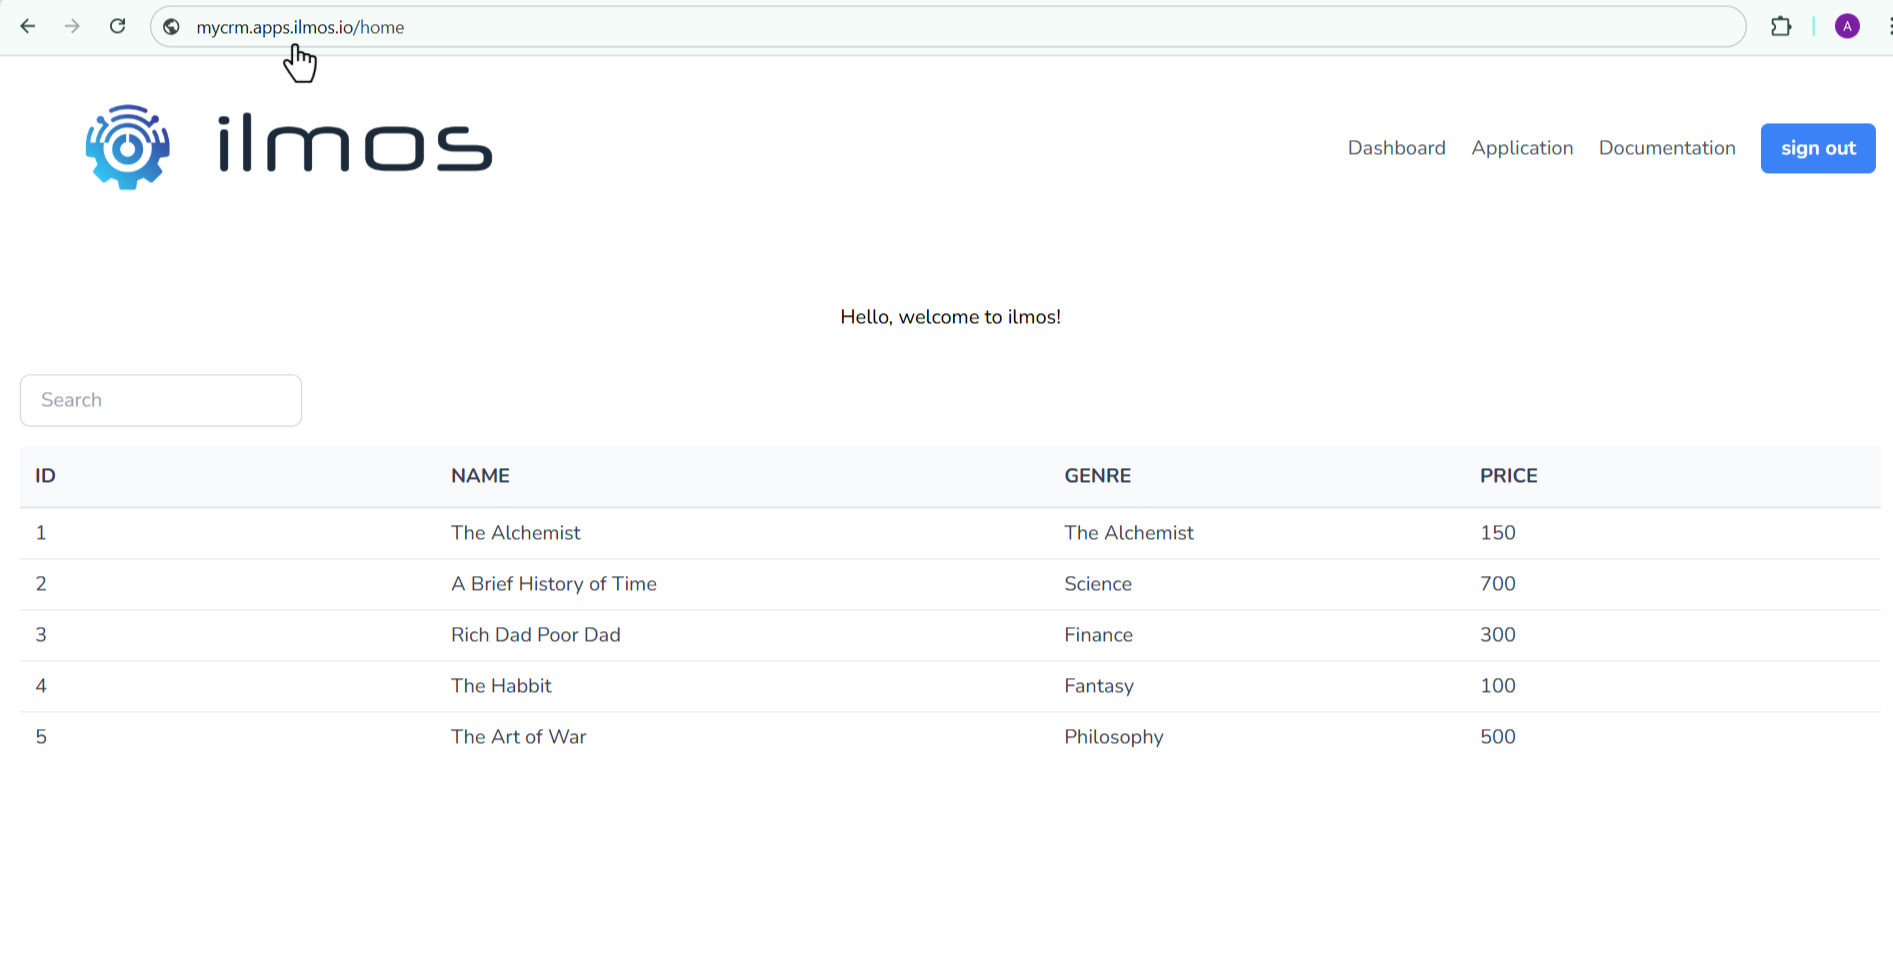
Click the Save button to apply your changes. Once saved, your page will be accessible at:
https://<yourAppName>.apps.ilmos.io/<yourRouteName> (e.g.,
https://mycrm.apps.ilmos.io/home).
FAQs
No coding is required. Ilmos is designed for non-developers and business users. However, technical users can extend functionality using JavaScript, custom APIs, and advanced configuration options if desired.
Integration with external APIs—including Google Sheets—is currently under development. Support for connecting to spreadsheets and other third-party services will be available in an upcoming release.
Yes, Ilmos offers a free plan that includes essential features, limited storage, and access to the core builder. It's ideal for individuals and small teams. Premium plans unlock additional features such as custom domains, higher limits, and enterprise tools.
Yes. Ilmos supports multi-user collaboration. Teams can work together in real time, with access control, version tracking, and shared workspace functionality built in.
Absolutely. Once your app is ready, you can publish it using a public URL provided by Ilmos. If you're on a paid plan, you can also connect a custom domain and configure access control settings like authentication and user roles.
Ilmos allows you to design workflows visually by connecting controllers, APIs, and data sources. You can automate tasks such as form submissions, data processing, or email notifications without writing any backend code.
Ilmos is versatile—you can build internal tools, dashboards, CRMs, data-entry systems, portals, and even client-facing web applications. It's ideal for startups, operations teams, and anyone who needs a custom app fast.
Yes. All apps built with Ilmos use responsive design by default. The drag-and-drop interface allows you to preview and adjust layouts for desktop, tablet, and mobile screens.
Ilmos uses secure cloud infrastructure, encrypted data storage, and access controls to protect your information. For enterprise users, additional compliance and custom security options are available.
Yes, Ilmos is built specifically to help users create applications without writing code. Whether you're building internal tools, customer portals, or data dashboards, Ilmos provides a visual builder, ready-to-use components, data management, and automation tools to guide you every step of the way—from idea to deployment.
Need help? Check out our resources:
Getting Started Building your first App Add Data to your App Controllers Contact SupportBuild Your Dream App in Minutes!
Unlock the power of no-code development with Ilmos. Create, customize, and launch your web app effortlessly—no coding skills required.
Start for free and explore all features. No credit card required.